
Voyti
Quick Start
Verify prerequisites
- PHP 8.3 or higher with
ext-intl - A connected database in your host application via Yii Database
- PHP 8.3 or higher with
Install
Voyti’s core is view-agnostic; you need a views implementation package to render any pages.
voyti-views-bootstrap5is the reference implementation using Bootstrap 5. You can substitute an alternative views package if you prefer a different UI framework, as long as it announces itsviewsdirectory through theviewsPackagePathsparam.Building an API-only backend instead?
voyti-api-stateless-clientalready provides theyiirocks/voyti-viewscontract itself, so installing it satisfies this requirement without a separate views package.Optional packages to extend functionality:
Bot ProtectionGoogle reCAPTCHA v2/v3 for registration and login formsBrute-force ProtectionExponential backoff delays for failed login and registration attempts, tracked per IP addressGDPR Data HandlingExport user data and anonymize accounts for compliance with data protection regulationsREST API / UserJSON user CRUD endpoints with bearer-token authentication and API key lifecycle management. Add the optional rate-limiter package for per-user request throttling.Stateless Client APICredential login, registration, password reset, profile and session management for SPAs and other bearer-token clientsSocial AuthenticationOAuth2 login via Google, GitHub, Facebook, and moreToast NotificationsRenders Voyti's flash messages as Bootstrap 5 toastsTwo-Factor AuthenticationEmail codes and/or TOTP (authenticator app) and/or WebAuthn/passkeys for stronger account securitySet the cookie secret
Voyti encrypts the remember-me cookie usingyiisoft/cookies' secret key. Leaving it unset throws aLogicException. Generate a strong, random string and set it inconfig/params.php.return [ 'yiisoft/cookies' => [ 'secretKey' => $_ENV['COOKIES_SECRET'], ], ];Here’s a random value for
secretKey, in case you need one:Run migrations
Voyti provides its migration path through
config/params-console.phpusing the standardyiisoft/db-migrationconfiguration keys. Withyiisoft/db-migrationenabled in your console app, run:Voyti’s migration creates 6 user-related tables (user, user_profile, user_token, user_sessions, user_password_history, user_audit_log) and seeds default roles and permissions into the RBAC tables created by
yiisoft/rbac-db.The same migration also seeds a default admin account: username
admin, emailadmin@example.com, and a random password printed to the console. Change this password immediately after first login.The account is assigned the
administratorrole, which is granted theadministratorPermissionNamepermission needed to reach the admin dashboard.Register routes
Routes are not auto-registered - you must add them to your router configuration.
Pull the
voyti-routesconfig group into your router definition. The example below mounts them under a/user/prefix as their own group, alongside your app’s own routes:use Yiisoft\Config\Config; use Yiisoft\Definitions\DynamicReference; use Yiisoft\Router\Group; use Yiisoft\Router\RouteCollection; use Yiisoft\Router\RouteCollectionInterface; use Yiisoft\Router\RouteCollector; use Yiisoft\Session\SessionMiddleware; use YiiRocks\Voyti\Middleware\VoytiMiddleware; /** @var Config $config */ return [ RouteCollectionInterface::class => [ 'class' => RouteCollection::class, '__construct()' => [ 'collector' => DynamicReference::to( static fn() => (new RouteCollector()) ->addRoute( Group::create('/') ->middleware( SessionMiddleware::class, # required for site-wide session support VoytiMiddleware::class, # Site-wide enforcement ) ->routes(...$config->get('routes')), # Your routes Group::create('/user/') # Voyti web URL prefix ->routes(...$config->get('voyti-routes')), # Voyti web routes ) ), ], ], ];voyti-routesalready wraps itself with its own required middleware (seeconfig/routes.php), so the group above doesn’t repeat any of it, and addingVoytiMiddlewareto your own group only extends that same coverage to your app’s pages.Configure the form theme
This step is optional but highly recommended. Without it, forms and buttons will render without any styling.Voyti’s forms (login, registration, profile, etc.) and button-styled links render through
yiisoft/form’sThemeContainer.Set a theme in
config/params.php.yiisoft/formships ready-made Bootstrap 5 configs you can use as-is:use Yiisoft\Form\Theme\ThemePath; use Yiisoft\FormModel\ValidationRulesEnricher; return [ 'yiisoft/form' => [ 'themes' => [ 'default' => [ ...require ThemePath::BOOTSTRAP5_VERTICAL, 'enrichFromValidationRules' => true, 'validationRulesEnricher' => new ValidationRulesEnricher(), ], ], 'defaultTheme' => 'default', ], ];Swap in
ThemePath::BOOTSTRAP5_HORIZONTALfor a horizontal label/input layout, or write your own array ofTheme::__construct()options if you’re not using Bootstrap.enrichFromValidationRulesandvalidationRulesEnrichertranslate theyiisoft/validatorrules on your form models (Required,Length,Regex, etc.) into matching HTML5 input attributes (required,minlength/maxlength,pattern, and so on), giving you client-side validation automatically.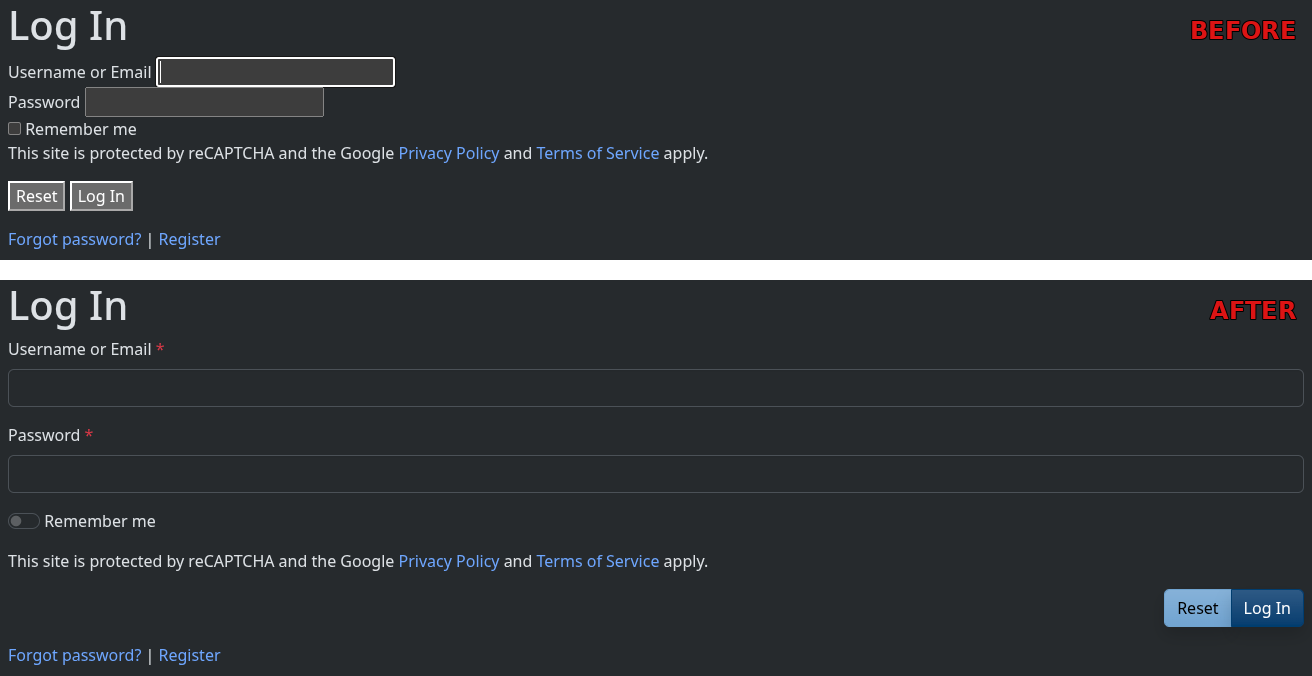
Done
DI bindings, event listeners, and console commands are auto-registered via the Yii3 config plugin. No manual wiring needed.